Leek and Potato Soup

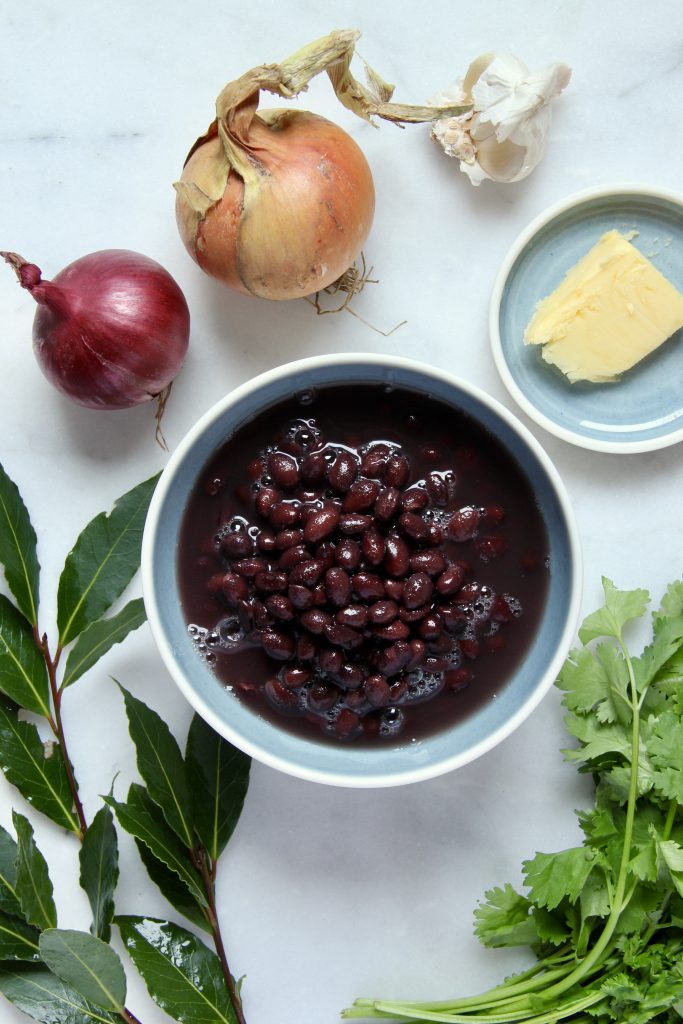
This classic soup is as simple as the name suggests. However, a couple of extra ingredients will always help, particularly those base ingredients onion and garlic. If, like myself, you are running low on onions, you can substitute in some celery, or other alternatives include spring onion or chives.

I’ve made this soup smooth, however, I do on occasion make it chunky where I leave cubes of potato and slices of leek whole to add texture to the soup. If you have the time, cut your potatoes into 1cm cubes, and slice your leeks into 0.5cm rounds. Then just before blending, take a scoop or two out and then return once the soup has been blitzed. This method works best with more waxy potatoes which don’t fall apart when cooking, but if you only have floury potatoes they work perfectly for a smooth blended soup.

Serves 8

Ingredients

  • 2 tbsp rapeseed oil
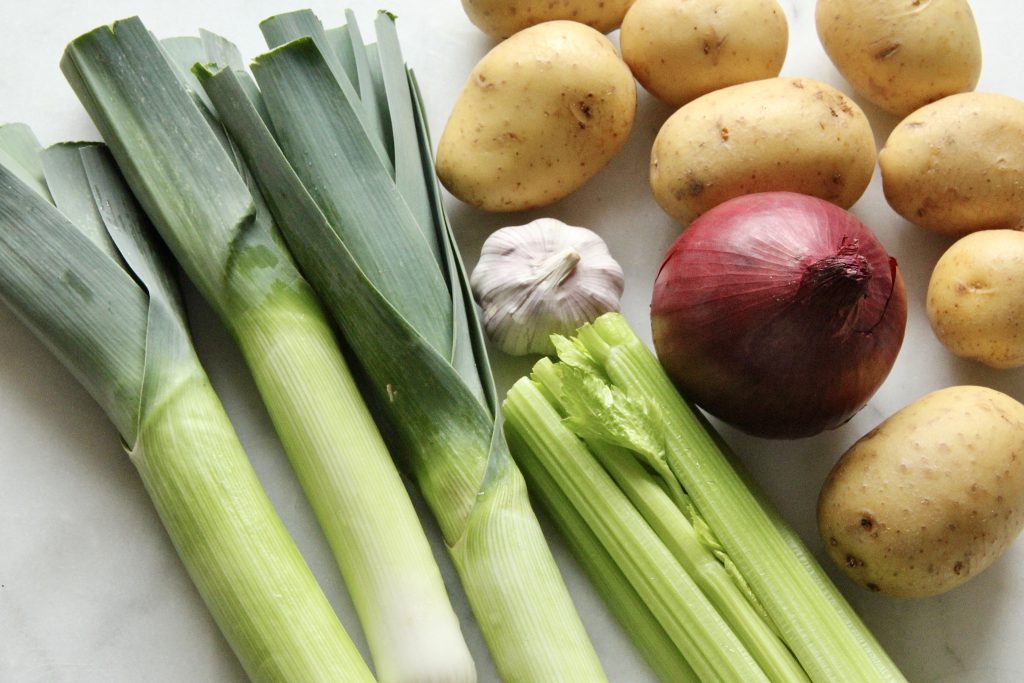
  • 1 large onion, finely diced
  • 4 sticks celery, finely diced
  • 3 leeks, finely sliced
  • 4 cloves garlic, roughly chopped
  • 800g potatoes, diced
  • 15g stock powder

To serve

  • 150ml double cream (optional)
  • Chives, finely chopped

Recipe

  • Cook the onions on a gentile heat with the oil for 5 minutes before adding the celery and continuing to cook till soft and translucent.
  • Add the garlic and leeks and cook for a further 2 minutes.
  • Add the potatoes, stock powder and top up with water till all the ingredients are almost covered, around 1.2 litres, and simmer for 20 minutes, stirring occasionally.
  • Blend the soup till smooth, finish with cream (optional) and chives, and serve.

Per serving 331kcal/ 19.3g fat/ 6.8g saturated fat/ 32.1g carbohydrates/ 5.0g fibre/ 4.6g protein

Seeded Banana Bread

I love this recipe for using up bananas which are past their sell by date. Somehow, you can never quite have the right number of bananas. It’s either too few or too many. And whenever I have too many I either freeze them ready to make smoothies out of, or turn them into this lovely cake.

This originally was my mum’s recipe, but I’ve added a few twists which my mum has now incorporated herself. She used to use butter, but for speed and nutritional value, I switched it to extra virgin olive oil. At first she protested, then she baked her first loaf using it and was converted immediately, proclaiming how much easier it was in comparison to melting and cooling the butter. The recipe also happens to be so simple, and forgiving! If you don’t have some of the ingredients they’re easy to swap in and out, and you can change the flavour of your bread depending on what you have, or what you fancy. If you want something more fruity, substitute some of the seeds for dried fruits, or even fresh or frozen for a delicious burst of flavour.

I also use two different types of flour to help maximise the diversity of the foods I’m eating each week. Of course I won’t be having this every week, but when I do I’d like to think that I can still be good while being naughty. The same goes for the seeds. I use a wide variety and generally use a premixed packet and then add in whatever I think is missing.

This recipe can easy be multiplied up according to how many bananas you have, but a word of caution. When using a 2lb tin or larger, the centre of the cake can sometime fail to rise due to the density and weight. This banana bread is not light and fluffy like a traditional sponge cake. It is loaded with fibre from seeds and whole grain flours which help increase the nutritional content of this treat. If multiplying up you can try baking in multiple small tins or in individual cupcake cases – just alter the timings so that a skewer inserted into the centre comes out clean. Anything beyond what you want to eat fresh can be frozen – I slice my loaf and freeze it so I can pull out a slice or two depending on how many I need.

Serves 8

Ingredients

  • 1 large ripe banana
  • 80g dairy yoghurt (if using non-dairy add 10g extra fat)
  • Zest and juice of 1/2 an unwaxed lemon
  • 1/2 tsp vanilla paste or essence
  • 50ml EVOO
  • 1 large egg
  • 60g rye flour
  • 60g spelt flour
  • 20g ground linseeds
  • 1/2 tsp baking powder
  • 1/2 tsp bicarbonate of soda
  • 50g caster sugar
  • 40g mixed seeds + extra for sprinkling over the top

Method

  • Line a 1lb loaf tin and preheat the oven to 150°C fan/ 160°C convection
  • Mash the banana with the yoghurt, followed by all the remaining wet ingredients.
  • Mix all the dry ingredients together. Then combine with the wet ingredients and mix till combined.
  • Pour the mixture into the tin, sprinkle with seeds and bake for 35-40 minutes till a skewer inserted into the centre comes out clean.
  • Remove from the oven and turn out onto a wire rack to cool.

Per serving: 208kcal/ 10.5g fat/ 6.8g saturated fat/ 18.5g carbohydrates/ 3.5g fibre/ 5.5g protein

Sundried Tomato and Herb Bulgar Wheat

This is a staple in my house. I almost always have the store cupboard goods, and I grow chives in the garden so have them for most of the year, so all I really need to make sure I have bought is flat leaf parsley. And if you don’t have flat leaf parsley, you can substitute any green leaves in place, such as lettuce, rocket or even spinach.

I frequently have this as an easy lunch. I prepare it in a big batch and it will last 4 days in the fridge easily. Then I serve with with some salad vegetables, such as tomatoes, cucumber and avocado, and a source of protein. Usually I’d opt for tinned beans or cheeses such as goat’s cheese or halloumi, but fish, even tinned fish, also work well as do left over cuts of cold meat.

Ingredients

  • 100g bulgar wheat
  • 10g stock powder
  • 15g chives, finely chopped
  • 30g flat leaf parsley, finely chopped
  • 35g sun-dried tomatoes, finely sliced
  • Chilli, to taste, finely chopped

Method

  • Bring 120ml water to the boil. Add the stock powder and bulgar wheat, remove from the heat and cover. Leave to cook for 5-8 minutes.
  • Once cooked, fluff with a fork and add all the remaining ingredients.

Per serving: 144kcal/ 1.4g fat/ 0.4g saturated fat/ 27.8g carbohydrates/ 8.9g fibre/ 7.0g protein

Sourdough

Sourdough. Risen with wild yeast, which come from Bert who lives in my fridge. Something so simple it is literally flour, water and salt. That’s it. It’s as simple as that, yet can be transformed into the most delicious bread. My recipe takes around 36 hours, and while it’s got only a few steps which require a lot of attention, it is well worth the wait. I always make 2 loaves, one to eat fresh on the day, and one sliced and frozen ready for eating later in the week.

If you haven’t got a starter, there’s no reason you can’t make one and have it ready to bake with in a week. Simply start by mixing 50% wholemeal and 50% white plain flour together. Take a handful and mix it with lukewarm water and leave in a cool area for a few days. Once you see bubbles forming, start to feed you starter by discarding about 80%, and adding 1:1 water and 50/50 flour blend to make a thick batter. Repeat this process ever day till it predictively rises and falls between feeds.

For a full tutorial length video visit my YouTube channel.

Makes 2 small loves, 1 large loaf, 3 pizza bases, or 1 large focaccia

Recipe

  • 15g starter
  • 25g wholemeal flour
  • 25g plain flour + extra for dusting
  • 100g strong wholemeal flour
  • 400g strong white flour
  • 8g salt
  • Seeds (optional)
  • Rice flour
  • Ice cubes

Method

  • Start the night before you plan to make the dough. Take 15g of your starter culture, add 50ml lukewarm water, 25g wholemeal flour and 25g plain white flour and mix well. Leave covered overnight at room temperature for around 10 hours. This is your leaven.
  • The next morning, mix the strong flours together in a large container. Measure 300ml of 25°C water, add 100g of leaven and mix. Pour over the flour and mix till a stiff dough forms. Cover and leave to rest for 30-45 minutes.
  • Measure 50ml of 25°C water and add 8g of salt. Stir to dissolve and pour over the dough. Mix in, scrunching and breaking the dough up. Once fully mixed cover and rest for 45-60 minutes.
  • Dipping your hands in water to prevent the dough from sticking to you, perform a coil turn. Start by folding the top half of the dough under itself. Repeat for the bottom half of the dough. Turn the container 90° and repeat the process, folding the top half of the dough underneath itself and the bottom half of the dough underneath itself. This is one coil foil. Cover and leave for 45-60 minutes.
  • Repeat the process 3 more times. If you wish to add anything to the dough, do it before performing the second coil fold.
  • After a 60 minute rest after the 4th coil fold, use a dough spatula to pull the dough out onto the work surface and dust with a 50/50 mixture of plain flour and rice flour. If making 2 loaves, cut the dough into two and flip so the floured side is not on the bottom. Build tension in the dough by folding the edges into the centre of the dough, trying to incorporate as little flour as possible. Flip the ball over, and, using one hand and the dough spatula, work in a series of turns and pulls to create tension on the surface of the ball. Leave to rest on the worktop covered in a tea towel for 30 minutes.
  • Lift each ball off keeping the round shape, flipping it do the underside is now the top. Take care not to knock out air, gently stretch the dough out, folding the bottom half almost to the top. Stretch the sides out, folding the right side into the centre followed by the left side. Finally, take the top, stretch out and fold up and over, and roll the whole ball away so the seams are on the bottom. Round the corners by cupping your hands around and gently pulling to create tension over the surface. Leave to rest for 1 minutes.
  • Dust a proving basket and transfer the shaped dough seam side up, pinching to maintain tension. Cover and leave to rise overnight in the fridge.
  • The next day, preheat the oven to maximum with a cast iron Dutch oven inside. Allow to reach temperature and leave for a further 20 minutes.
  • Remove the dough from the oven and cut a piece of baking parchment larger than your dough. Uncover the dough, place the parchment over the top and gently invert the dough out onto the work surface on the parchment. Dust off any excess flour, and make a deep, yet shallow angled cut across the surface of the bread. This cut will allow for “oven spring”. An unscored loaf will be stunted and may burst.
  • Moving as quickly and safely as possible, remove the bottom pan of the Dutch oven from the oven, leaving the lid in the oven, and place the dough and parchment into the pan. Add a few ice cubes to the pan under the parchment and immediately return to the oven, close the lid to trap the steam, shut the oven door and drop the oven temperature to 230°C and bake for 20 minutes.
  • After 20 minutes, remove the lid and bake for a further 20 minutes till the crust is dark and crispy. Remove and allow to cool on a wire rack. Listen to your bread sing from the oven as the crust cools and crackles.
  • Once cooled slightly, slice and dip into balsamic vinegar and extra virgin olive oil.

Jerusalem Artichoke and Carrot Soup

Jerusalem artichokes are high in prebiotic inulin, which gives rise to their nickname of fartichokes! They are delicious and earthy, and are surprisingly versatile. Treat them like a potato; boiled, mashed, roasted or sautéed in a pan. Additionally they can also be treated like a water chestnut, eaten raw grated over salads or quickly cooked in a stir fry so they maintain a crunch. Get them while you can, they go like hot potatoes and are only in season during winter months.

Serves 4

Recipe

  • 1 tbsp rapeseed oil
  • 1 onion, finely diced
  • 4 sticks celery, finely diced
  • 4 garlic cloves, finely sliced
  • 500g Jerusalem Artichokes, peeled and roughly chopped
  • 4 carrots, roughly chopped
  • 10g stock powder
  • 10 sprigs thyme
  • 850ml water

Method

  • Gently fry the onion in the oil till soft and translucent. Add the celery and garlic and cook for a further 2 minutes without browning.
  • Add the artichokes, carrots, thyme, stock and water and bring up to a gentile simmer for 20 minutes. Remove any hard herb stalks.
  • Remove from the heat and bend till smooth.

Optional extra: gently fry sage leaves in butter or olive oil till crispy and serve over the top.

Per serving 144kcal/ 4.5g fat/ 0.6g saturated fat/ 23.8g carbohydrates/ 7.3g fibre/ 3.5g protein

Red Pepper and Goat’s Cheese Salad

This recipe is adapted from the Meat Free Monday cookbook. I don’t think I could have assembled the ingredients any better than them, so, as they saying goes, if it ain’t broke, don’t fix it.

I do however alter the methods used. In the cookbook, they peel the peppers once cooked. You could do this if you wanted, but I leave the skins on as this add flavour, texture, fibre and also reduces the hands on time for making this dish. Win win.

I love using lentils in my salads. Not only are the a cheap cupboard food, they are packed full of plant-based protein and high in fibre. So much so, they are the biggest contributor of fibre to this dish which packs a whopping 14.6g per portion – that’s nearly half you daily target just in a single dish.

Serves 2

Recipe

  • 2 red peppers
  • 100g puy lentils
  • 60g goat’s cheese
  • 1 small red onion, finely diced
  • 3-4 sun-dried tomatoes
  • 1 bunch flat leaf parsley
  • 2 tsp olive oil
  • 2tsp balsamic vinegar
  • Juice of half a lemon

Method

  • Preheat the oven to 200°C/ 180°C fan/ gas mark 6. Place the peppers on a tray and roast for 30 minutes till blistered. Allow to cool.
  • Meanwhile, wash the lentils and cover with cold water. Bring up to the boil for 10 minutes, and the allow to gently simmer for 15-20 minutes till just firm in the centre. Drain.
  • Once cool, de-seed and roughly chop the pepper, parsley, sun-dried tomatoes and goat’s cheese, and dress with the olive oil, balsamic vinegar and lemon juice.

Per serving 348kcal/ 13.3g fat/ 8.0g saturated fat/ 30g carbohydrates/ 14.6 fibre/ 19.6g protein

Smoked Mackerel Pâté

One of my favourite ways to eat mackerel is as smoked mackerel pâté. I learnt this while working at Leiths School of Food and Wine, and it is something I’ve made ever since. It would also seem that I’m not the only one in my family to love this recipe. As soon as I took the packed of smoked mackerel out of the fridge, Willow was hot on my heels. Turns out she likes getting her portion of oily fish just as much as I do! And who can resist those big puppy eyes.

Mackerel is an oily fish, and as such is good source of healthy fats, including omega 3 fatty acids which are beneficial to our overall health. In particular, omega-3 has been linked to heart health.

This recipes calls for some fermented foods as well in the form of gherkins. While I realise they might not be to everyone’s taste, I really recommend you trying it with this dish. So if you want to, try serving the gherkins thinly sliced on the side and I’m sure it will win you over.

I also prefer to keep my pâté quite chunky, so I stir it just to combine all the flavours. If you prefer a smoother pâté, mash the mackerel up with a fork.

Serves 4 as a starter

Recipe

  • 220g boneless and skinless MSC certified smoked mackerel
  • 15g chives, finely chopped
  • 15g flat leaf parsley, finely chopped
  • 1 large or 2 small gherkins, finely diced
  • 100g reduced fat creme fraiche
  • Juice of half a lemon

Method

  • Break the smoked mackerel into large chunks and gently combine with the remaining ingredients.

Delicious served with freshly toasted sourdough bread

Per serving 227kcal/ 18.3g fat/ 5.6g saturated fat/ 2.1g omega 3 fat/ 2.7g carbohydrates/ 0.8g fibre/ 12.5g protein

Roasted Carrot and Yellow Split Pea Hummus

Visiting the historical town of Winchester, we decided to stop for lunch at Hugh Fearnley-Whittingstall’s River Cottage Kitchen. We shared a starter of a mixed mezze board, but the single dish that stood out from the board for me was the carrot and yellow split pea hummus.

I haven’t been able to stop thinking about it, it may have been the best hummus I have ever had. So I trawled through Hugh’s books to find a recipe, but alas, there were none to be found. So I have endeavoured to make my own.

Cooked Yellow Split Peas

Split peas are a great addition to your diet, naturally low in fat, high in plant-based protein and a source of fibre. We can often forget about including beans and pulses in as part of our weekly plant food diversity, but we should be aiming to eat from all 6 categories of plant-based foods; fruits, vegetables, nuts, seeds, whole grains, and legumes. This particular recipe covers 4 out of the 6 groups, and by adding some wholegrain crackers, perhaps even topped with nuts you could maximise the diversity of your diet.

Serves 6

Recipe

  • 100g split yellow peas
  • 2 carrots, washed and chopped into large pieces
  • 2 cloves garlic, skins on
  • 30g tahini
  • 40ml extra virgin olive oil
  • 90ml water (you may need more or less depending on the texture you wish for)
  • 1/2 tsp ground cumin
  • 1/2 tsp ground turmeric
  • 30g flat leaf parsley, roughly chopped
  • Juice of a lemon
  • Salt and pepper to taste

To serve

  • Fresh Parsley leaves
  • Nigella seeds
  • Vegetable crudites e.g. carrots, radish, cauliflower
  • Crackers

Method

  • Wash the split peas in cold water, then top with 500ml water and bring to the boil for 10 minutes before lowering the heat to a gentile simmer for 25 minutes. Drain and allow to cool.
  • When the peas are simmering, roast the carrots and garlic cloves in the oven preheated to 180 ° C/170 ° C Fan/GM4 for 20 minutes. Allow to cool.
  • Add the cooked peas, carrots and garlic clove, removing the skin, to a food processor. Add the tahini, extra virgin olive oil, lemon juice, water, spices and parsley and blend. Season to taste and add more water if the dip remains too thick.
  • Serve sprinkled with nigella seeds and fresh parsley leaves.

Per serving 107kcal/ 3.6g fat/ 2.0g saturated fat/ 11.6g carbohydrates/ 3.1g fibre/ 5.3g protein

Cheats Refried Beans

Refried beans are a party food staple in my house. I always make them whenever I’m having a gathering, but I have to be prepared and start the day before. However, this is the cheats version. I say cheat because I’m using already cooked beans from the tin. No need for soaking over night, or boiling for hours. You can decide to make these an hour before serving, without compromising on the taste.

This is a really versatile dip, something I always make in large batches as it sits well in the fridge for a week, ready to be lovingly transformed into the next meal. I love using this as a spread in a wrap for a burrito, quesadillas with melted cheese, enchiladas or even tostadas if you’re feeling fancy!

In addition, you can easily make these vegan. The recipe below is vegetarian, but if you replace the butter with rapeseed oil in the base mix, you’ll be all set for Veganuary. Then you can either use them as is, or use a vegan sour cream and cheese alternative to make the full on refried beans experience.

All that’s left to say is Happy New Year and enjoy whatever you’re doing (and eating)!

Serves 4

Recipe

  • 1 tin of black beans
  • 3-4 large cloves of garlic, sliced in half
  • 1/2 white onion
  • 1 small bunch of coriander, stalks separated from leaves, leaves chopped
  • 3 fresh bayleaves, crushed
  • 1 red onion, finely diced
  • 20g butter (or rapeseed oil if making vegan)
  • 1 garlic clove, finely sliced

To serve (optional)

  • Soured cream
  • Cheese e.g. Cheddar, Cheshire or Wensleydale
  • Coriander leaves
  • Tortilla chips

Method

  • Pour the tin of black beans with their water into a pan. Fill the can with water and add to the beans.
  • Add the half onion, halved garlic, bayleaves and coriander stalks. Bring to the boil and allow to simmer for 30 minutes. If your beans were unsalted, add in salt to your taste.
  • Meanwhile, gently fry the red onion in your choice of fat till softened. Add the garlic and continue cooking for a further 2 minutes.
  • Drain the beans, reserving the cooking liquid. Discard the garlic, bayleaf, onion and coriander stalks.
  • Blend the beans with a little of the cooking water till the desired thickened of dipping. I like to keep mine quite chunky.
  • Add the fried onion and garlic and half the chopped coriander leaves.
  • Top with soured cream, cheese and more coriander leaves and serve with tortilla chips.

Per Serving of Beans 96kcal/ 2.6g fat/ 1.5g saturated fat/ 11.2g carbohydrates/ 4.7 fibre/ 4.9g protein

Refried beans
Refried beans

Mince Pies

Whether you made your own mincemeat or not, there are still ways to help increase the diversity of plant fibres in your mince pies. You could try adding in some extra dried fruit to bought mincemeat, zesting in some clementine zest, or try adding carrot like in my own mincemeat recipe. And you don’t have to stop there, you can even change the pastry!

In my recipe, I use a mixture of shortcrust pastry to stay traditional, but use a crumble topping instead, keeping it lighter, but also so it allows me to include more plant sources. I use both oats and ground almonds in my crumble.

Each of my mince pies contains around double that of shop bought mince pies. I always find it harder to include fibrous foods over the festive period as there are so many treats to eat! My homemade mince pies contain 8 different source of plant-based goodness, and research shows those who eat 30 or more different sources of plant-based foods per week have an increased variety of gut microbiota in comparison those who eat 10 or fewer different sources. So feed your microbiome!

These mince pies are delicious served warm with vanilla custard, a true Christmas time treat.

If you want to make vegan mince pies, use a pre-made vegetable oil based shortcrust pastry and top with the crumble mixture substituting the butter for rapeseed oil.

Makes 12 deep-filled mince pies

Recipe

  • 750g mincemeat, shop bought or homemade
  • Short crust pastry, either bought or homemade (see below)
  • 75g plain flour
  • 50g fridge cold butter
  • 25g rolled oats
  • 50g ground almonds
  • 25g soft light brown sugar

Method

  • Preheat the oven to 200°C/180°C Fan
  • Roll the pastry out to 2mm, around the thickness of a 2p coin.
  • Cut disks of pastry out to 11-12cm diameter and line a muffin tray.
  • Fill each case with mincemeat, leaving a little gap at the top.
  • Make the crumble topping by mixing the flour and butter together until the mixture resembles fine breadcrumbs.
  • Add the oats, almonds and sugar and combine.
  • Top each mince pie with a spoonful of the crumble topping*.
  • Bake for 22-25 minutes till golden brown.
  • Cool on a wire rack

To make your own shortcrust pastry combine 225g plain flour with 100g cold butter till it resemble bread crumbs. Add just enough cold water to form a dough. Wrap and rest it in the fridge for 30 minutes before rolling.

Mince Pies

Per Mince Pie 327kcal/ 13.7g fat/ 4.5g saturated fat/ 48.1g carbohydrates/ 2.5 fibre/ 3.2g protein

*Crumble topping makes enough for 24 mince pies

Mincemeat

Homemade mince pies are something special at Christmas. Taking it one step further and making your own mincemeat means you can decide what goes in. For me, shop bought mincemeat sometimes feels like it’s missing some of the fruit. Making your own mincemeat is so quick, and I guarantee the flavour will be so much better than the shop bought stuff, and it’s ready to use in just 24 hours so there’s no excuses for not making your own!

Mincemeat Ingredients

I use butter rather than suet in my recipe. I think this gives a much richer flavour, and is also vegetarian friendly. You’ll also see I don’t stop at just fruit. A sneaky carrot also makes it into the mix in my version. This is great for increasing the diversity of plant fibres in this recipe, which we know can be beneficial for your gut microbiota and gut health in general. Why not treat your microbes this Christmas too!

Overall this basic mincemeat recipe uses 6 different plant-based fibre sources, alongside mixed spice. You can substitute different fruit in depending on your taste, for example cherries, apricot or mixed peel.

A generous swig of cognac

Makes enough mincemeat for 24 deep filled individual mince pies

Recipe

  • 200g sultanas
  • 200g raisins
  • 200g currants
  • 100g dried cranberries
  • 1 large carrot (or 3 small like my allotment carrots!)
  • 1 cooking apple
  • 350g soft light brown sugar
  • 175g fridge cold butter (option to use vegetarian suet to make vegan, or to be a traditionalist and use beef suet)
  • 2 tsp ground mixed spice
  • 1 organic orange
  • 100ml cognac, brandy, whisky or rum

Method

  • Coarsely grate the apple, carrot and butter.
  • Zest and juice the orange, taking as much of the segment flesh as possible.
  • Put all the ingredients in a large bowl and mix together. Set aside covered with a tea towel.
  • Stir occasionally for the next 24 hours.
  • Fill previously sterilised jars with the mincemeat, ensuring to push out all the air.
  • Seal and leave in a cool dark place for up to 6 months to mature.

Per 100g 304kcal/ 9.2g fat/ 5.9g saturated fat/ 49.5g carbohydrates/ 2.8g fibre/ 1.4g protein

Homemade mincemeat