Beetroot and Goat Cheese Risotto

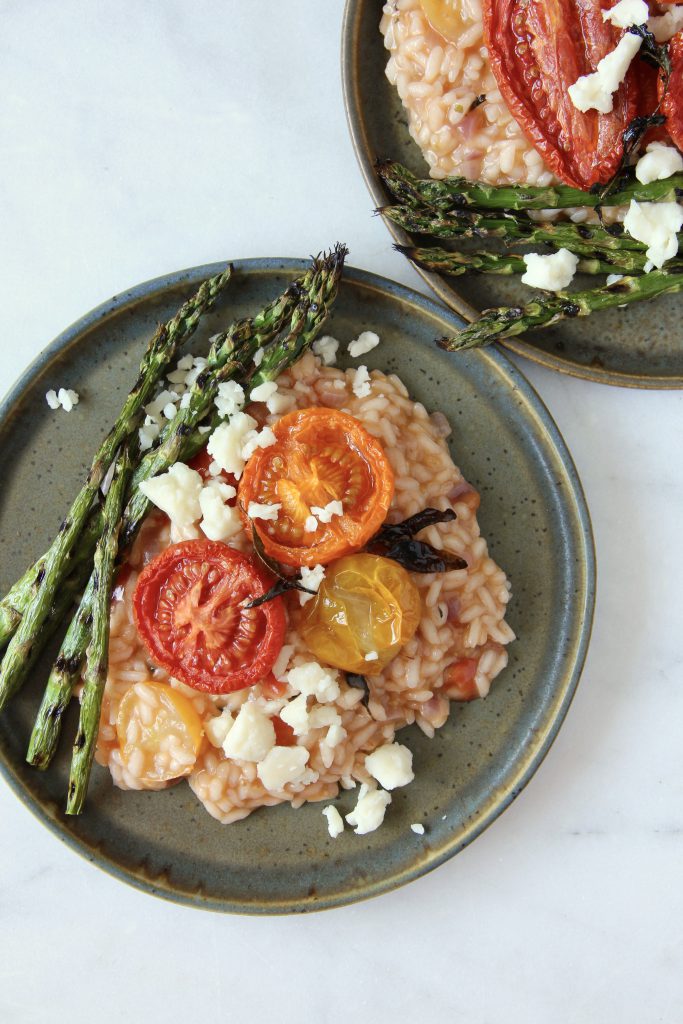
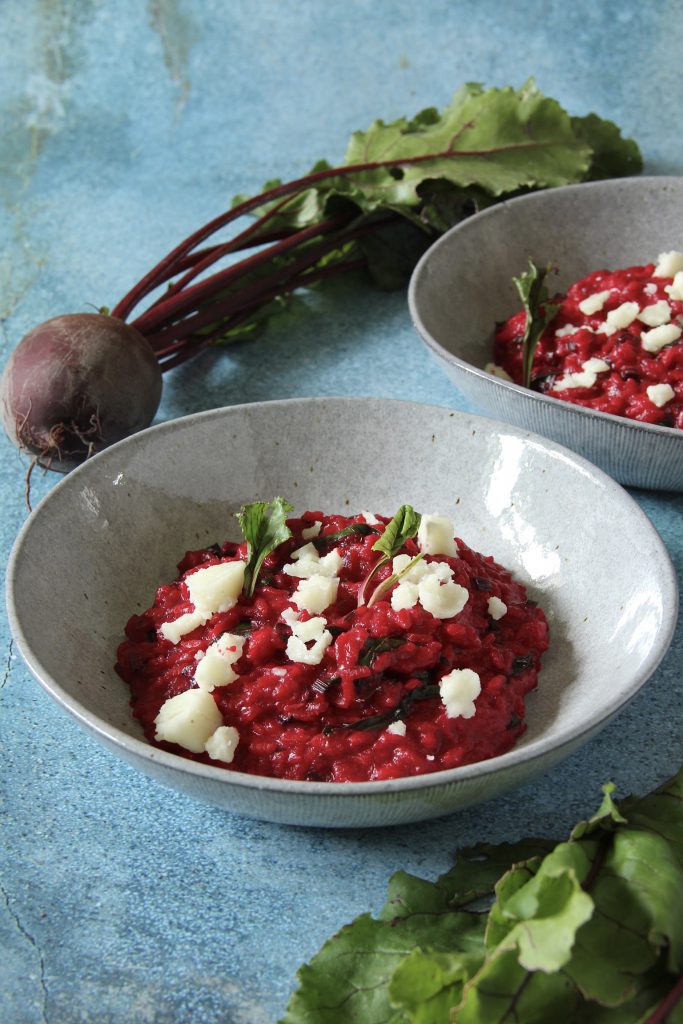
I love the colour of this dish. It can’t help but put a smile on your face. Such a bright red-pink colour from the fresh beetroots and it’s something that will also make your gut microbiota smile too…. if they had faces!

Beetroots are naturally high in nitrates, something that has been found to help reduce blood pressure, improve blood flow and possibly have an effect on athletic performance. How? Nitrates are converted to nitric oxide in the body, which has an effect on our blood vessels, dilating them and allowing greater delivery of oxygenated blood to our muscles when consumed prior to exercise.

A 2013 review of UK and Australian studies concluded that the nitrates in the beetroot (usually consumed as beetroot juice) can help improve endurance as measured by time to exhaustion. There are also benefits to gym-goers too as a separate study, conducted in 2016, found that beetroot juice improved performance in resistance training. Those who consumed a 70ml shot of beetroot juice (400mg nitrate) prior to training were able to complete more reps to failure compared with those taking a placebo control.

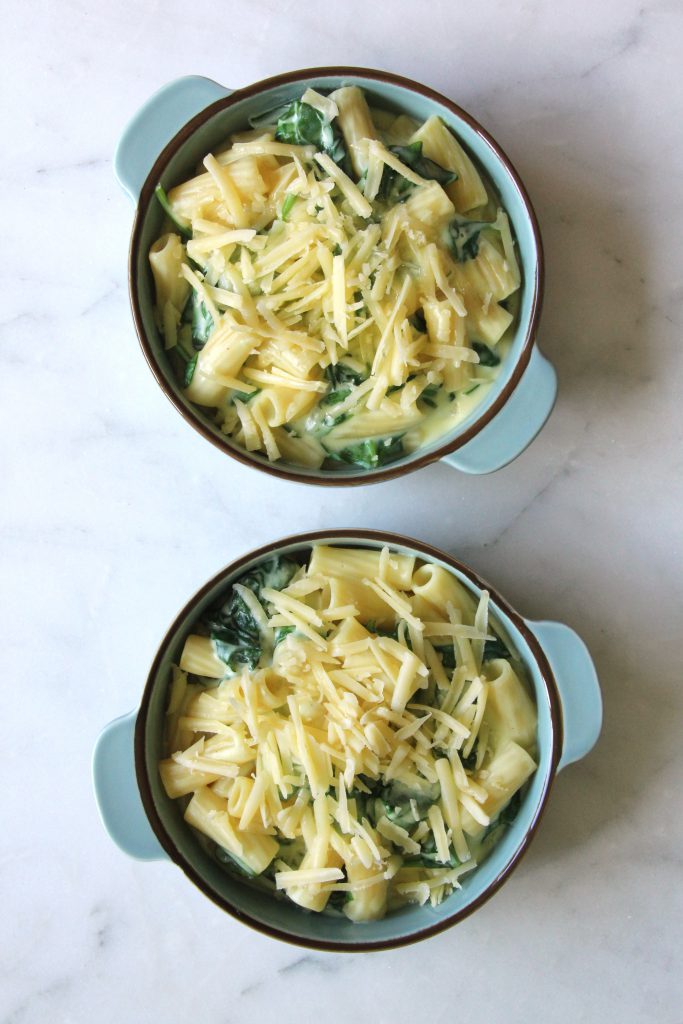
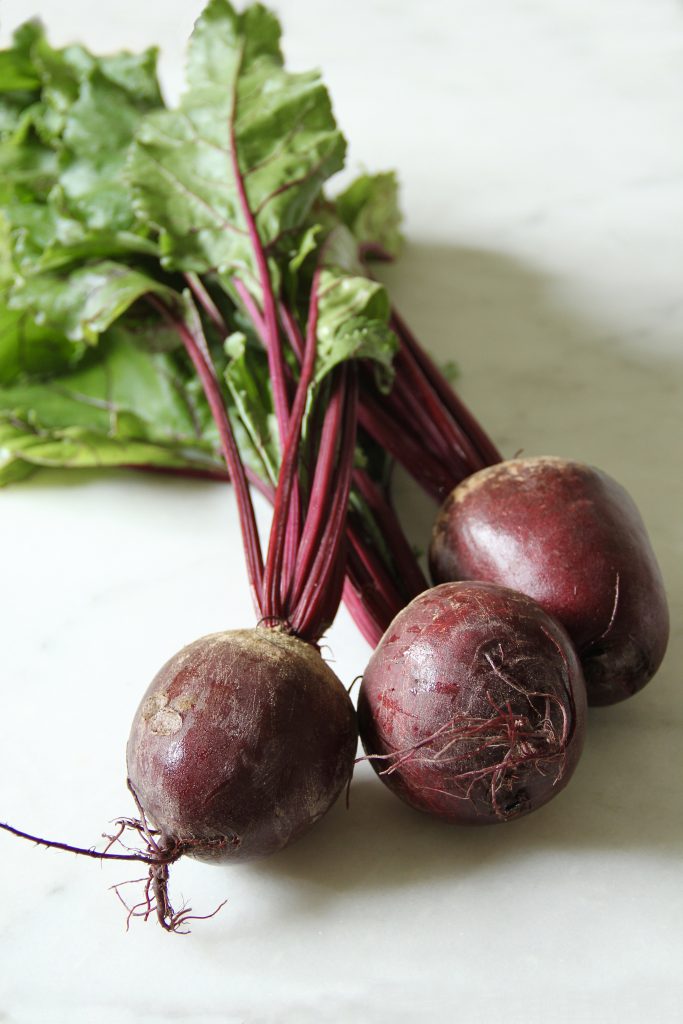
If you don’t have fresh beetroot you can use pre-cooked beetroots, but the colour will be slightly faded due to the high temperatures used to vacuum pack and store them. Simply skip boiling the beetroot, blending directly into the hot stock, and start the risotto straight away. Another alternative would be to buy beetroot juice, however, the fibre will be removed from this, so I would use this if it is your only option available. If you don’t have the leaves still attached to the beetroot, try using spinach, rainbow chard, or kale as an alternative.

Serves 4 as a main course

Ingredients

  • 350g peeled beetroot, cubed
  • 10g stock powder
  • 2 onions, finely diced
  • 30ml extra virgin olive oil
  • 3 garlic cloves, finely chopped
  • 300g risotto rice
  • 150ml white wine
  • 4 sprigs of thyme
  • 60g parmesan, grated
  • 150g beetroot leaves, roughly chopped
  • 60g goats cheese

Method

  • Place the beetroot and stock powder into a large pan and add 400ml boiling water. Cook for 10 minutes to soften the beetroot and blend till smooth. Return to the heat and keep ward without boiling.
  • Meanwhile, sweat the onions in the oil till soft and translucent. Add the garlic and cook for a further 2 minutes.
  • Add the rice, coating all the grains in the oil and gently toast before adding the white wine. Stir continuously.
  • Once the wine has been absorbed by the rice, add a ladle of beetroot stock. Keep stirring and adding stock till all the stock has been used up. If you need to use more liquid, add boiling water.
  • When the rice is almost cooked to al dente, add the beetroot leaves and allow to wilt.
  • Take off the heat and stir in the parmesan cheese.
  • Plate up and crumble the goat cheese over the top.

Per serving: 488kcal/ 11.0g fat/ 6.2g saturated fat/ 72.0g carbohydrates/ 5.0g fibre/ 17.4g protein

Green Bean Curry

I’m a firm believer that curries taste best when cooked long and slow, and often taste best the next day once the flavours have had time to mingle. However, there is always an exception to the rule, and this is it.

For those who are growing their own beans, you may be over-run with a large glut and not sure how to use them all up. Otherwise it’s time to buy some British seasonal beans while they’re in stock and make this delicious summer curry. Alternatively, you can buy frozen broad beans to make the dish all year round.

Serves 6

Ingredients

  • 2 onions, sliced
  • 1 tbsp vegetable oil
  • 3 garlic cloves, roughly diced
  • 1cm piece of ginger, finely diced
  • 15g butter
  • 2 tsp cumin seeds
  • 2 tsp mustard seeds
  • 1 tsp garam masala
  • 2 tsp turmeric
  • 1/4 tsp salt
  • Large pinch of curry leaves
  • 900g mixed green beans e.g. podded broad beans, runner beans, green beans, dwarf beans, all chopped into roughly equal sizes.
  • 300ml coconut milk

To serve

  • Brown basmati rice
  • Toasted coconut flakes
  • Fresh coriander

Method

  • Gently fry the onions in the vegetable oil till soft and translucent, but without colouring.
  • Add the garlic and ginger and cook for 2 minutes before adding the butter and spices.
  • Add the beans and stir to coat in the spices. Add the coconut milk and cook for 5 minutes. If the curry looks a little dry, add some water.
  • Serve over steamed rice and top with toasted coconut flakes and fresh coriander leaves.

Per serving: 195kcal/ 12.7g fat/ 2.4g saturated fat/ 12.3g carbohydrates/ 6.5g fibre/ 5.5g protein

Carrot Top Pesto

Late spring, or early summer means thinning the carrots out at the allotment so we can grow some nice big carrots ready for long winter days. I always get sad at being forced to choose which carrots will go on to grow, sometimes to the point where I leave too many baby carrots in the soil.

I always try to make sure I put the tiny carrots to good use. Sometimes I simply wash them and eat them there and then. Nothing like a simple snack to keep me going! However, I have now come to terms with this cruel to be kind nature, and make sure nothing is waste.

Carrot top pesto with baby carrots is my answer to this. The young and tender leaves make the most delicious and earthy pesto which is delicious when served simple through hot pasta. The pesto is so simple to make, and if you have too many carrot tops you can always freeze the pesto for use at a later date.

Nutritionally speaking there has been very little research conducted on carrot leaves. One study commented on how carrot leaves can be used to fortify chicken’s diets to make the yolks of the eggs they lay more orange in colour due to the carotenoids present in the leaves! Something I have not tested my chickens on yet!

Ingredients

  • A large bunch of carrot tops (about 100g), roughly chopped
  • 1 bunch of basil (30g), roughly chopped
  • 2 tbsp extra virgin olive oil
  • 1 garlic clove
  • 40g pine nuts, toasted
  • 45g parmesan cheese, grated

Method

  • Place the carrot tops, basil, olive oil and garlic into a food processor and blend till smooth.
  • Add the pine nuts and parmesan and blend to the consistency desired – I prefer to have some unblended pine nuts in my pesto.
  • Hey pesto! You’re done!

Courgette, Feta and Mint Fritters

At present I currently have courgettes coming out of my ears! 1 courgette plant would be sufficient to feed a small family with a steady supply of courgettes each week. So naturally we have 10 plants (not to mention the questionable marrow-looking plants) and I am spending all my free time trying to work out new ways of giving courgettes away to unwilling neighbours – they are all currently sick of courgettes too!

Making these super light fritters is the perfect way of using up a courgette or two. You simply do not realise you are eating courgette till you have wiped the plate clean.

Serves 2

Ingredients

  • 1 medium courgette, around 180g, grated
  • 1 medium egg
  • 50g wholemeal flour
  • 1/2 tsp baking powder
  • 50ml milk
  • 10 mint leaves, finely sliced
  • 1 garlic clove, finely grated
  • 40g flat leaf parsley, roughly chopped
  • 70g feta cheese, crumbled
  • Chilli flakes to taste
  • Extra virgin olive oil to fry

Options to serve with:

  • Sour cream
  • Poached egg
  • Avocado
  • Smoked salmon
  • Salad

Method

  • Combine the flour and baking powder together in a large bowl and mix. Season with pepper to taste.
  • Add the milk and egg to make a batter. Add the remaining ingredients and stir to combine.
  • Heat a pan with 1/2 tsp olive oil and add a spoonful of batter into the pan, spreading them out so each round does not touch another. You should be able to make around 6 fritters in total.
  • Fry each fritter for 2 minutes per side till golden brown. Repeat till all the batter is used. If you are making a larger quantity keep them warm on a tray in a pre-heated oven set to 100°C.
  • Serve hot with your toppings of choice.

Per 3 fritters: 265kcal/ 12.3g fat/ 7.1g saturated fat/ 23.6g carbohydrates/ 4.3g fibre/ 15.0g protein

Chickpea and Halloumi Traybake

I love halloumi. The salty, squeakiness is irresistible in my household, so we always have a block or two in the fridge ready for when the fridge is a little bare.

Although I am probably part of a small minority who actually likes halloumi cold, although I am in agreement that hot, crispy, golden and squidgy halloumi is the best. Even when it’s not barbecue season, I still eat it, either by frying it in a pan as part of a mean vegetarian brunch, or roasting it in the oven till it is crispy and golden on the top.

While halloumi is high in salt and fats including saturated fat, as is often found with cheeses, it is a good source of non-meat protein, especially for those wishing to reduce their meat intake. I try to use halloumi less often because of the salt content, and to help combat this when cooking with it I never season the dish with salt.

If you have the time and the will, stick the halloumi and peppers onto the barbecue to get a lovely charred flavour. The remaining ingredients can be cooked as normal in the oven, and then combine the two together to finish the dish.

I love this dish served with simple herbed couscous. You could of course serve it with rice, bulgar wheat, potato salad or even some garlic flatbreads. Alternatively, to make only one dish dirty, slice potatoes into large wedges and roast in the tray for 25 minutes with a little extra oil. Then top with the chickpeas and vegetables and carry on roasting.

Serves 2

Ingredients

  • 1 can of chickpeas, drained and rinsed
  • 2 bell peppers, cut into large chunks
  • 1 large or two small red onions, sliced into wedges through the root
  • 200g baby plum tomatoes
  • 2 cloves of garlic, skin on
  • 3 sprigs oregano, leaves removed from stems
  • 1 red chilli, to taste, diced
  • 1 tbsp olive oil
  • 100g halloumi, sliced into large chunks

To serve

  • 100g couscous
  • Chives, finely chopped
  • Flat-leaf parsley, roughly chopped

Method

  • Preheat the oven to 180°C fan, 190°C convection
  • Mix all the ingredients except the halloumi together in an oven-proof dish. Season with pepper to taste.
  • Lay the halloumi over the top and bake in the oven for 25-30 minutes till the halloumi turns golden brown and the vegetables have softened.
  • Meanwhile, prepare the couscous by pouring 110ml boiling water over the top of the couscous with the chives and covering. Allow to steam for 5 minutes before fluffing the grains with a fork. Mix the flat-leaf parsley through.
  • Serve the chickpea and halloumi bake over the couscous and enjoy.

Per serving: 661kcal/ 25.2g fat/ 10.8g saturated fat/ 38.2g carbohydrates/ 14.2g fibre/ 26.5g protein

Banana and Strawberry Smoothie Pops

This is a super easy way of making the most of your brown bananas without having to make banana bread! Such an easy recipe it takes just 5 minutes. The hardest part is waiting for the ice pops to freeze, so making them the night before is the best way of killing the time.

This is also the perfect recipe to use the strawberry hulls in an attempt to waste less food whilst also increasing your fibre diversity intake. Simply remove the stem from the strawberries ready to blend!

For those who don’t have ice lolly moulds, you can freeze the bananas and strawberries, and then simply blend with the yoghurt to make smoothie bowls instead. It’s another fantastic way of keeping cool during the hot summer days.

Makes 6 100ml pops

Ingredients

  • 2 very ripe bananas
  • ~150g strawberries (you can choose to leave the strawberry hulls on)
  • 300g yoghurt of choice (I have used plain live dairy yoghurt)

Method

  • Weight the bananas into a large jug and top the weight up to 300g with strawberries.
  • Add 250g yoghurt and blend till smooth.
  • Add the remaining 50g yoghurt and lightly swirl in. Pour into your moulds and freeze according to the manufacturer’s guidelines.

Per 100g smoothie pop: 42kcal/ 0.7g fat/ 0.5g saturated fat/ 2.8g carbohydrates/ 1.0g fibre/ 1.2g protein

Spinach and Cottage Cheese Quiche

This is my brother’s favourite quiche. Full of delicious spinach, and a surprise ingredient, cottage cheese. I’ve added a few extra ingredients to the traditional recipe we originally used, this is to add a little extra fibre diversity, but also gives a little more depth of flavour.

The surprising use of cottage cheese in this dish means that some of the cream is replaced by this lower-fat dairy product. Cottage cheese is a low-fat cheese made using both curds and whey, meaning it retains some of the protein found in some dairy products. The little curds stay whole in the quiche so you get delicious nuggets of soft cheese throughout the quiche, giving an amazing texture and taste to the dish. No wonder it has been a favourite of my brothers for such a long time!

If you don’t have a 9″ flan tin, you can make smaller quiches using cupcake or muffin trays. Growing up my mum would always make these for birthday parties, so making mini individual quiches is perfect for hungry little fingers! It also freezes really well; if you want to serve them hot from the freezer, only partially cook them the first time round so you can re-crisp the pastry in the oven after defrosting.

This is perfect as a light dinner, or even served cold at a picnic or to take to work for lunch. I love serving it simply with a salad.

If you don’t want to make your own pastry then shop bought is fine. I use a full butter recipe in my shortcrust pastry recipe, but for those who need to watch their saturated fat intakes, using shop bought vegetable fat based shortcrust pastry is an option here. If you need to make a gluten-free version, use a gluten-free pastry, or alternatively if you want a crustless quiche butter the sides of a cake tin.

Serves 4 as a main, 6 for a lighter lunch or starter

Ingredients

  • 260g shortcrust pastry
  • 1 onion, finely diced
  • 2 tbsp extra virgin olive oil
  • 400g spinach, fresh or frozen
  • 1/2 nutmeg, grated
  • 300g cottage cheese
  • 3 large eggs
  • 50 parmesan, grated
  • 90ml double cream
  • 100g tomatoes, sliced

Method

  • Roll the pastry out to a thickness of 2mm and line a 9″ flan tin, leaving excess pastry overhanging the edge. Chill in the fridge.
  • Preheat the oven to 180°C fan, 190°C convection, and once up to temperature, prick the base of the pastry with a fork and blind bake the pastry case using non-stick paper and baking beans or dried rice for 15 minutes.
  • Remove the baking beans and paper and return the tin to the oven for a further 5 minutes.
  • Meanwhile, gently fry the onion in the oil till soft before adding the spinach and cooking until all the water evaporates. Turn off the heat and allow to cool slightly.
  • Mix the cottage cheese, eggs, parmesan and double cream together and season with nutmeg and pepper to taste.
  • Once the spinach has cooled, add to the wet ingredients and mix before pouring into the pastry case.
  • Top with sliced tomatoes and bake for 30-35 minutes till puffed up and golden brown*^.

Per sixth of a quiche: 376kcal/ 22.9g fat/ 13.5g saturated fat/ 24.9g carbohydrates/ 2.0g fibre/ 16.4g protein

*If freezing, part bake for 15-20 minutes till puffed up but without a golden brown colour. Allow to cool fully before storing in an airtight container in the freezer for up to 3 months. To reheat, pre-heat the oven to 180°C fan, 190°C convection, place back into the tin, and bake for 15 minutes till golden brown.

^If making mini individual quiches cook for 15-20 minutes.

Coconut, Elderflower and Strawberry Chia Pudding

A super easy pudding which tastes so creamy yet so light and tasty. Using seasonal summer flavours, you can adapt this recipe to whatever is in season. If you don’t drink alcohol, try making it using cordial alone.

I very lightly fermented my coconut milk in my kefir grains at room temperature for 4 hours. This gives a very mild probiotic kick to the pudding, but if you don’t have your own kefir grains, or follow a vegan diet, you can just use the milk as it is.

I also keep the strawberry hulls on the whole strawberries for decoration. When I remove strawberry hulls for aesthetics, I either give the chickens a treat, or keep them in the freezer to later add to smoothies for an extra fibre diversity kick!

Serves 2

Ingredients

  • 40g chia seeds
  • 240ml coconut milk or any other milk of choice
  • 2 tbsp elderflower cordial
  • 240g strawberries plus extra for decoration
  • 2 tbsp elderflower liquor

Method

  • Mix the chia seeds, coconut milk and elderflower cordial together and leave to set in the fridge for 45 minutes.
  • Meanwhile, finely dice the strawberries and mix with the elderflower liquor.
  • Layer the chia seed mix into two glasses, layer the marinated strawberries over the top and garnish with whole strawberries, hulls and all!
Coconut, Strawberry and Elderflower Chia Pudding

Per serving: 228kcal/ 7.7g fat/ 2.4g saturated fat/ 29.9g carbohydrates/ 8.9g fibre/ 5.2g protein

Miso Aubergine with Crispy Chickpeas

Miso is a kitchen shortcut to a deep umami flavour boost for so many different dishes. My miso aubergine in influenced by the Nobu miso black cod. I’ve changed up a few ingredients to make it slightly healthier, and this works on cod too, so for those who eat fish, you can make the same marinade, but cook the fish for less time, around 15-18 minutes depending on the size of your fillets.

If you can get sake, the traditional Japanese rice wine, that would be true to the Japanese miso cod recipe. However, if you are unable to get it, Chinese rice wine is a good substitute, as is a dry white wine.

This dish is delicious served with steamed brown and wild basmati rice, garlic ginger dressed pak choi and quick pickled carrots for further fibre diversity!

Ingredients

  • 30ml sake
  • 30ml mirin
  • 5ml rice wine vinegar
  • 2 tbsp white miso paste
  • 20g stoned dates
  • 1 large aubergine
  • 200g tinned chickpeas, drained
  • 1 tsp EVOO
  • 1 tsp toasted sesame seeds
  • 1 spring onion, finely sliced
  • Chilli to taste, finely diced
  • Coriander leaves

Method

  • Mix the sake, mirin, rice wine vinegar, miso paste, dates and 20ml water into a small pan. Cook over a low heat till the dates have softened and the alcohol has cooked off. Blend to a smooth paste.
  • Slice the aubergine in half and score the fresh in diamond shapes, ensuring you do not cut through the skin. Place in an oven-proof dish.
  • Pour the miso sauce over the cut side of the aubergine and gently open up the cuts to allow the marinade to penetrate into the flesh. Leave to marinade to 30 minutes at room temperature, or put in the fridge if making in advance.
  • Preheat the oven to 200°C Fan, 220°C convection, gas mark 6.
  • Add the chickpeas and oil to the pan with the aubergine and gently toss in any excess marinade. Add 30ml water to the pan.
  • Cook for 30 minutes, mixing the chickpeas after 15 minutes. If the chickpeas look like they might burn add a little extra water.
  • Remove from the oven and scatter with sesame seeds, spring onion, chilli and coriander.

Per serving 288kcal/ 6.6g fat/ 0.9g saturated fat/ 37.9g carbohydrates/ 10.1g fibre/ 11.8g protein

Yellow Split Pea Curry

Yellow split peas are such a versatile bean. So simple to cook and they make a really mean curry as would any lentil.

Yellow split peas are also extremely high in fibre, containing around 16g fibre per 100g cooked peas. In comparison, red lentils provide 6g fibre, and green lentils 8.7g when cooked.

Yellow split peas also retain a firmer texture when cooked, even for a long period of time. This means that they won’t fall apart, so you always get a rewarding chunky texture to your dish.

Serves 6

Ingredients

  • 2 tbsp vegetable oil
  • 2 large onions, sliced
  • 4 cloves garlic, roughly chopped
  • 20g ginger, roughly chopped
  • 2 tbsp tomato puree
  • 2 tsp ground turmeric
  • 2 tsp garam masala
  • 2 tsp chilli powder (or to taste)
  • 200g yellow split peas
  • 200g fresh tomatoes, roughly chopped
  • 1 large aubergine, roughly chopped
  • 1 courgette, roughly chopped
  • 300ml coconut milk
  • 30g coriander, chopped

To Serve

  • Lemon wedges
  • Cooked rice
  • Kefir naan

Method

  • Soften the onion in the oil till translucent but not brown.
  • Crush the garlic and ginger in a pestle and mortar and add to the onions. Cook for 2 minutes before adding in the tomato puree, dried spices, split peas, tomatoes, aubergine and courgette. Add 600ml water and simmer for 40 minutes till the peas are cooked through.
  • Add the coconut milk 5 minutes before serving.
  • Sprinkle in the coriander and serve with a wedge of lemon.

Per serving 334kcal/ 16.1g fat/ 1.6g saturated fat/ 25.4g carbohydrates/ 19.4g fibre/ 14.0g protein

Spinach Macaroni

I have lovely fond memories of walking into Godalming high street and lunching with friends in the local vegetarian and yoga café.

This gorgeous café, Café Mila, inspired this dish. Here I have had countless macaroni cheese dishes after walking several miles to get there, all as part of a team challenge to accumulate the highest number of steps.

I always remember the dish coming out, golden brown bubbling cheese covering macaroni with swirls of spinach. This dish is worth the trek! I do love my macaroni cheese, so sometimes I make my own “lighter” version by using reduced-fat cheddar cheese to help keep the total saturated fat under some control. However, if you don’t eat this all the time, and I don’t, using standard fat cheddar is completely fine. In addition, using mature or extra mature cheddar gives a stronger cheese flavour which can help you keep the quantity of cheese used overall lower.

This dish is perfect to make at the weekend when you have time, and then store in the fridge for a quick and easy meal later in the week. Alternatively, why not try making a larger batch and popping one in the freezer. Cooling cooked pasta has been shown to help further increase the fibre content through the formation of resistant starch, adding other benefits to this dish!

Another great way to increase the fibre content of this dish is to use high fibre pasta. This could either be using wholemeal pasta, where the whole grain is used or alternatively, there are now ranges of high fibre pastas. These are where fibre, such as oat, are added to the pasta before it is shaped. Adding extra fibre to your diet in this way is a really easy method for increasing your fibre intake without much effort. On average UK people eat only an average of 18g fibre per day, and the target is 30g fibre per day. This dish contains 5.7g fibre, but a simple swap to fibre enriched pasta could boost the fibre up to 12g per portion!

Serves 2

Recipe 

  • 15g butter
  • 20g plain flour
  • 360ml semi-skimmed milk
  • ½ tsp English mustard
  • 100g mature cheddar cheese, grated
  • 150g dried pasta
  • 140g spinach

Method 

  • Set the oven to 180°C fan/190°C convection.
  • Melt the butter in a medium-sized saucepan. Add the flour and cook for 1 minute before adding the milk a little at a time, stirring constantly till thick. Add the mustard and half the cheddar cheese and season with pepper to taste.
  • Meanwhile, cook the pasta for 2 minutes less than the packet instructions.
  • Once the pasta is cooked, add the spinach into the cheese sauce and mix, followed by the drained pasta.
  • Pour everything into an ovenproof dish and top with the remaining cheese and cook in the oven for 15-20 minutes till the top is golden brown and bubbling.
Spinach Macaroni Cheese

Per serving: 711kcal/ 28.9g fat/ 17.4g saturated fat/ 78.6g carbohydrates/ 5.7g fibre/ 31.7g protein

Tomato and Goats Cheese Risotto

Sticky slow-roasted tomatoes and crumbled goats cheese over a tomato risotto. A delicious summertime recipe I made in honour of British Tomato Fortnight.

It uses my slow roasted tomatoes which helps increase their lycopene concentration, which is a type of antioxidant found in lots of yellow to red colours fruits and vegetables. In the case of tomatoes, processing helps increase the concentration and bioavailability of lycopene as the cells break down and become more absorbable. In addition, consuming tomatoes with oil also aids lycopene uptake by the body as it is a fat soluble nutrient.

Ingredients

  • 2 small red onions, finely chopped
  • 2 tsp extra virgin olive oil
  • 2 cloves of garlic, minced
  • 120g tomatoes, roughly chopped
  • 150g risotto rice
  • 150ml white wine
  • 1 tsp vegetable stock powder

To serve

Method

  • Gently fry the onions and oil together till soft and translucent. Add the garlic and cook for a further 2 minutes.
  • Add the tomatoes and allow to start cooking before adding in the rice. Coat the rice in the oil before adding the wine and stock in. Stir continuously and add hot water a little at a time as the liquid is absorbed. Cook till the rice is al dente (20-25 minutes).
  • Serve with the slow-roasted tomatoes and crumbled goats cheese over the top.